Milk Bar Birthday Cake Recipe: How to Bake the Iconic Treat at Home
Introduction: The Magic of the Milk Bar Birthday Cake
Do you remember the excitement of your childhood birthday parties—the colorful balloons, the sound of friends laughing, and of course, that unforgettable slice of cake with sprinkles on top? Now imagine reliving that same moment but with a grown-up twist that tastes even better. That’s exactly what the Milk Bar Birthday Cake does.
Created by pastry chef Christina Tosi at her famous bakery, Milk Bar, this cake has earned legendary status. It’s funfetti-inspired but elevated into a masterpiece of layered flavors, textures, and pure nostalgia. The best part? You don’t have to book a trip to New York City or order an expensive cake online—you can make it right in your own kitchen.
In this guide, you’ll learn step by step how to make the original Milk Bar Birthday Cake recipe at home. With clear instructions, helpful tips, and insider tricks, you’ll end up with a show-stopping cake that tastes just like the real deal.
Table of Contents
What Is the Milk Bar Birthday Cake?
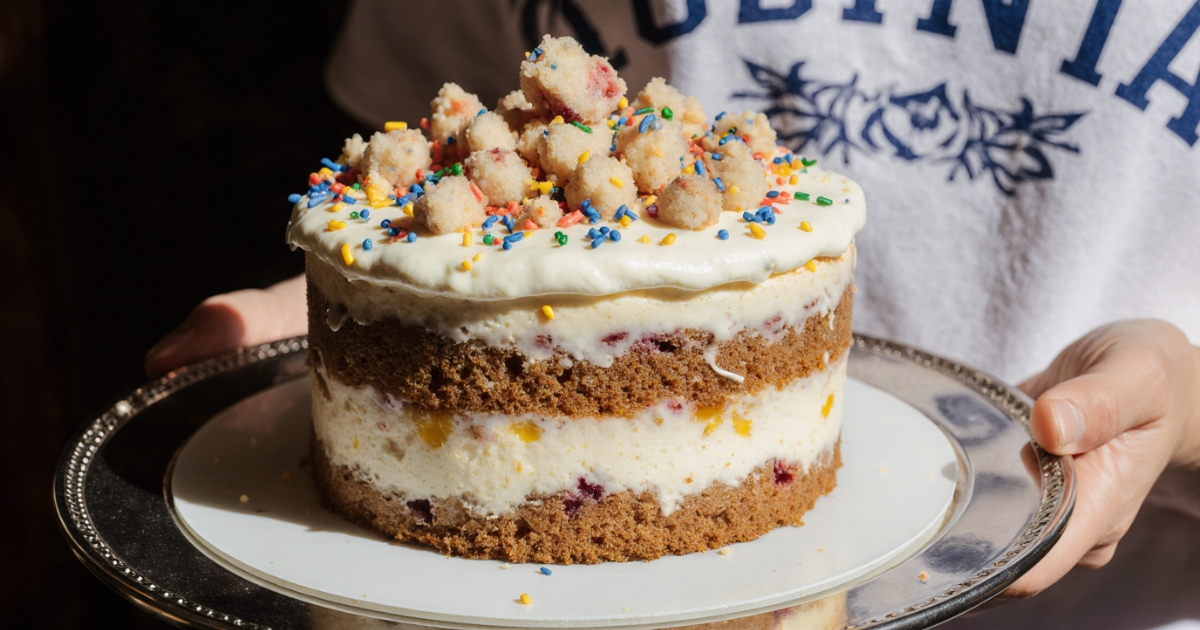
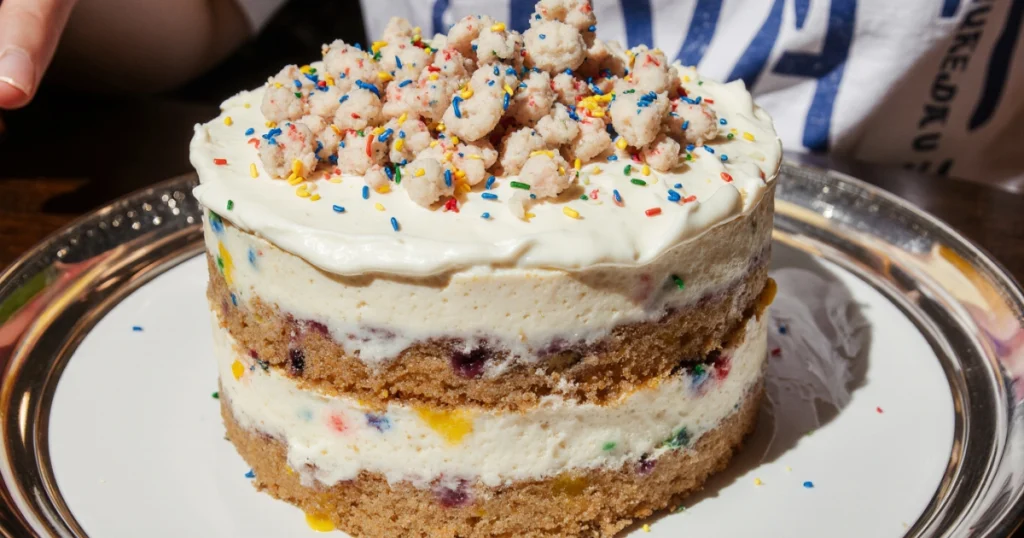
Before you start baking, let’s take a moment to understand why this cake stands out from the rest. At its heart, the Milk Bar Birthday Cake is a playful take on the classic funfetti cake—but with some genius upgrades.
- Layers of soft vanilla cake packed with rainbow sprinkles.
- Milk soak that keeps the cake extra moist.
- Creamy vanilla frosting that’s smooth but not overly sweet.
- Crunchy birthday crumbs baked to perfection, giving you that satisfying texture with every bite.
This isn’t just another dessert. It’s a cake that combines nostalgia, indulgence, and bakery-quality flair all in one.
Milk Bar Birthday Cake Recipe – Ingredients You’ll Need
Like any masterpiece, the secret lies in the details. To make this recipe, you’ll prepare four key components: the cake layers, the crumbs, the frosting, and the milk soak.
Cake Ingredients (Base Layer)
| Ingredient | Quantity | Notes |
|---|---|---|
| Flour | 2 1/2 cups | All-purpose works best |
| Sugar | 1 1/4 cups | Granulated |
| Baking powder | 3 tsp | For a light rise |
| Salt | 1 tsp | Balances sweetness |
| Butter | 1/2 cup | Room temperature |
| Eggs | 3 large | Adds structure |
| Buttermilk | 3/4 cup | Keeps it moist |
| Vanilla extract | 2 tsp | Rich flavor |
| Rainbow sprinkles | 1/2 cup | Adds funfetti look |
Milk Soak Ingredients
| Ingredient | Quantity |
|---|---|
| Whole milk | 1/2 cup |
| Vanilla extract | 1 tsp |
Frosting Ingredients
| Ingredient | Quantity |
|---|---|
| Butter | 1 cup (2 sticks) |
| Powdered sugar | 3 cups |
| Vanilla extract | 2 tsp |
| Salt | Pinch |
| Heavy cream | 2 tbsp |
Birthday Cake Crumbs Ingredients
| Ingredient | Quantity |
|---|---|
| Sugar | 1/2 cup |
| Flour | 1 1/2 cups |
| Baking powder | 1/4 tsp |
| Salt | 1/2 tsp |
| Butter | 1/4 cup (melted) |
| Sprinkles | 2 tbsp |
Step-by-Step Instructions – How to Make Milk Bar Birthday Cake at Home
Now comes the fun part. Follow these steps, and you’ll have a bakery-worthy cake that turns heads at any celebration.
Step 1 – Make the Cake Layers
- Preheat your oven to 350°F (175°C).
- Grease and line a sheet pan with parchment paper.
- Mix flour, baking powder, sugar, and salt in a large bowl.
- Beat butter until fluffy, then add eggs one by one.
- Stir in buttermilk, vanilla, and finally, sprinkles.
- Spread batter evenly in the pan and bake for about 30 minutes, until golden.
Step 2 – Bake the Birthday Cake Crumbs
- Combine sugar, flour, baking powder, and salt in a bowl.
- Add melted butter and mix until small clusters form.
- Spread on a baking sheet and bake for 20 minutes until crunchy.
Step 3 – Prepare the Frosting
- Beat butter until creamy.
- Add powdered sugar, vanilla, and salt.
- Mix in heavy cream until smooth and fluffy.
Step 4 – Create the Milk Soak
- Whisk milk and vanilla together.
- Brush this mixture generously over each cake layer to lock in moisture.
Step 5 – Assemble the Cake
- Cut out two full circles and two half circles from the sheet cake.
- Place the first cake circle in a cake ring.
- Soak with milk, spread frosting, and sprinkle crumbs.
- Repeat layers until all ingredients are used.
- Top with frosting, crumbs, and extra sprinkles.
Tip: Use acetate strips when assembling for neat, bakery-style edges.
Tips for Perfecting Your Milk Bar Birthday Cake
- Measure carefully: Precision is everything in baking.
- Don’t skip the milk soak: It’s what makes the cake unique.
- Chill before slicing: Freezing for a few hours ensures clean layers.
- Use high-quality sprinkles: Cheaper sprinkles can bleed color.
Variations & Creative Twists
Want to make it your own? Try these fun ideas:
- Chocolate Milk Bar Cake: Swap the vanilla base for chocolate.
- Gluten-free version: Use a 1:1 gluten-free flour blend.
- Mini birthday cakes: Assemble in jars or cupcake tins.
- Holiday twist: Use red and green sprinkles for Christmas or pastels for Easter.
Storing & Serving Milk Bar Birthday Cake
- Store in the refrigerator, wrapped tightly, for up to 5 days.
- Freeze for up to 1 month.
- Let it sit at room temperature for 30 minutes before serving for best flavor.
FAQ – Milk Bar Birthday Cake Recipe
What makes the Milk Bar Birthday Cake different from regular funfetti?
The key difference is the milk soak and crunchy crumbs, which add both moisture and texture.
Do I need special equipment to make this cake?
A cake ring and acetate sheets give you that professional finish, but you can assemble without them.
How far in advance can I make the cake?
You can prepare it up to 3 days ahead and store it in the fridge.
Can I take a shortcut with boxed cake mix?
Yes, but it won’t taste exactly like Milk Bar’s version. The homemade method is worth the effort.
Conclusion: Bring the Celebration Home
The Milk Bar Birthday Cake isn’t just dessert—it’s a slice of joy that takes you back to your happiest memories while giving you a bakery-level experience in your own kitchen. Once you’ve baked it yourself, you’ll see why it’s become such an icon.
So, roll up your sleeves, grab those sprinkles, and surprise your friends or family with this unforgettable treat. And here’s the best part—you don’t need a special occasion to make it. Sometimes, celebrating life itself is the perfect excuse.
Your turn: Try the recipe, share your creation, and let your inner pastry chef shine. After all, every day deserves a slice of birthday magic.
Leave a review :
There are no reviews yet. Be the first one to write one.