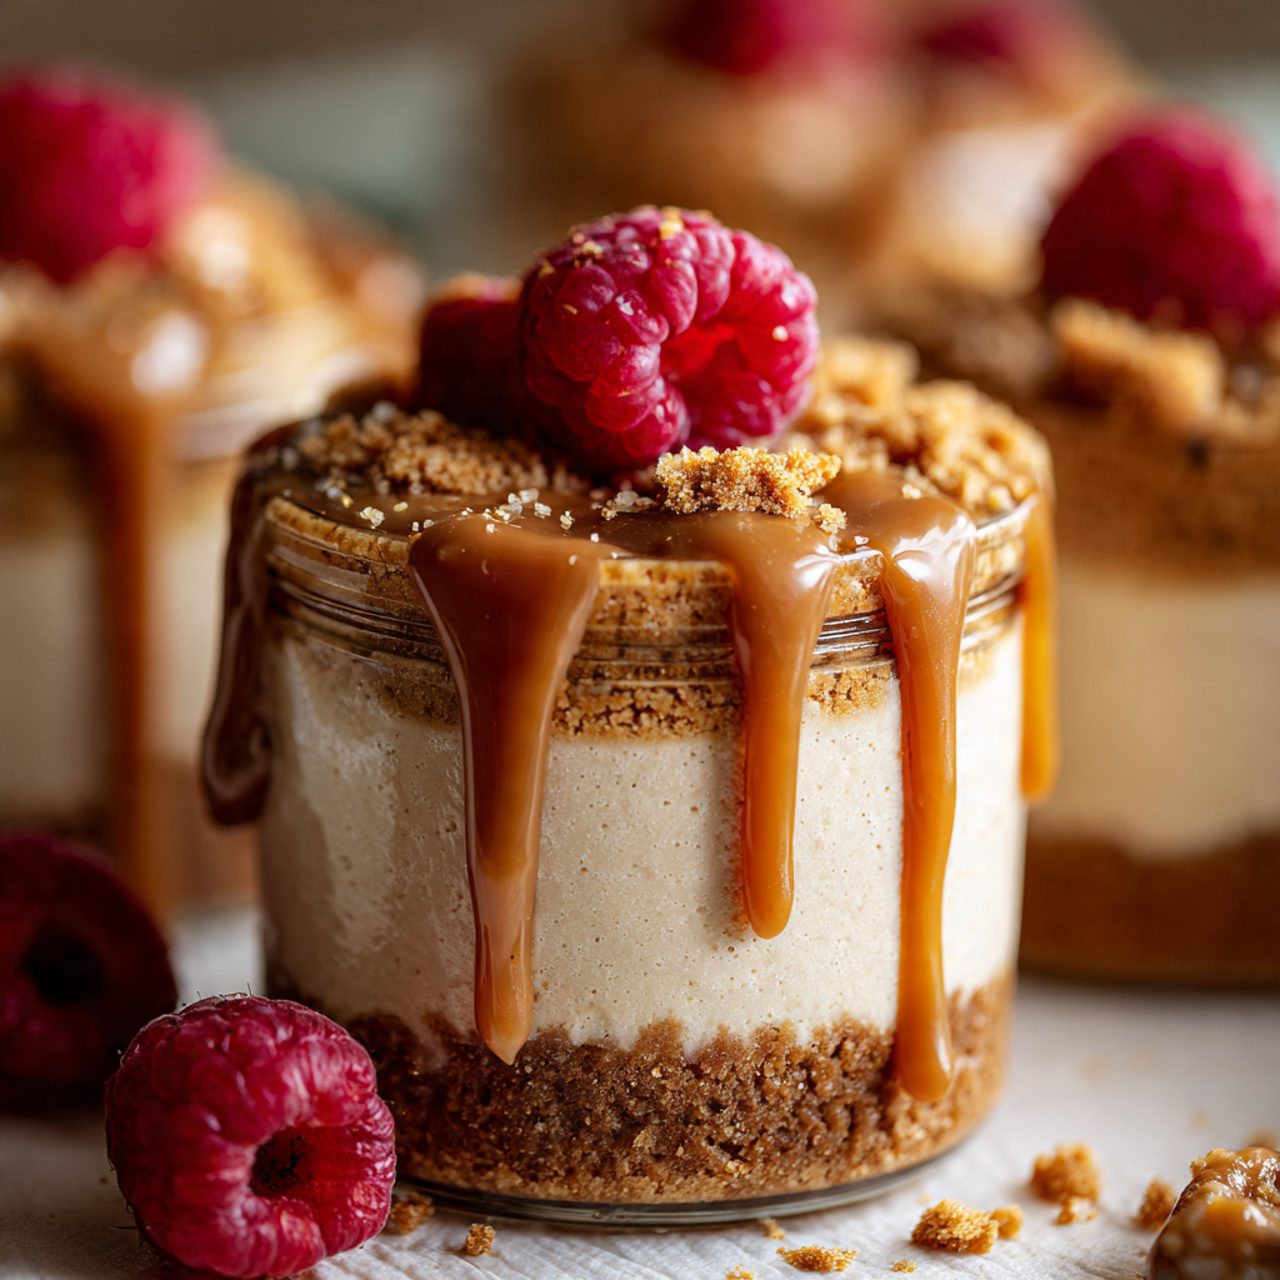
Irresistible 5-Ingredient No-Bake Biscoff Cheesecake Cups
Introduction
Have you ever craved a smooth, indulgent cheesecake but dreaded the hours spent baking and cooling? You’re not alone! Many people often think that creating a delicious cheesecake is a labor-intensive task, requiring complex techniques and a lengthy ingredient list. But what if I told you that you could whip up creamy, dreamy cheesecake cups in a fraction of the time with just five star ingredients? That’s right, these 5-ingredient no-bake Biscoff cheesecake cups are as simple as they are delightful. Let’s dive right in!
Ingredients List
To create these delectable no-bake cheesecake cups, you’ll need the following ingredients:
– Biscoff Cookies (about 10-12)
– Substitution: You can use graham crackers or any other favorite cookie for a different flavor.
– Cream Cheese (8 oz)
– Note: Ensure the cream cheese is softened for easier mixing. Vegan cream cheese can serve as a substitute.
– Powdered Sugar (1/4 cup)
– Alternative: For a healthier option, use stevia or a sugar alternative of your choice.
– Heavy Cream (1 cup)
– Substitution: Coconut cream can be used for a dairy-free version.
– Biscoff Spread (1/2 cup)
– Alteration: Nutella or any other chocolate spread can create a different flavor profile.
Timing
Preparing these indulgent no-bake cheesecake cups is a breeze! Here’s the timing breakdown:
– Prep Time: 15 minutes
– Chill Time: 2 hours (or longer for firmer texture)
– Total Time: 2 hours and 15 minutes
Imagine the sweet aroma of cookies combined with the smoothness of cream cheese—this treat will be worth the wait!
Step-by-Step Instructions
Step 1: Prepare the Crust
Start by finely crushing the Biscoff cookies in a food processor or by placing them in a sealed bag and using a rolling pin. You want them to be crumbly but not powdery.
Chef’s Tip: If you prefer a crunchier crust, leave a few larger cookie pieces intact.
Step 2: Mix the Cheese Filling
In a mixing bowl, combine the softened cream cheese and powdered sugar. Use a hand mixer to beat them together until smooth and creamy.
Chef’s Note: Be patient with the mixing; it helps to avoid lumps in your filling.
Step 3: Whip the Cream
In another bowl, whip the heavy cream until soft peaks form. This step is crucial for achieving a fluffy texture in your cheesecake.
Step 4: Combine Everything
Gently fold the whipped cream into the cream cheese mixture until combined. Then, add the Biscoff spread, folding until fully integrated.
Step 5: Assemble the Cups
In individual serving cups, layer the cookie crumbs at the bottom. Spoon in the cheesecake filling, then sprinkle a bit more cookie crumb on top for that perfect finish.
Chef’s Tip: For the ultimate indulgence, drizzle extra Biscoff spread over the top before serving!
Nutritional Information
Here’s what you’re looking at in each cheesecake cup (approximately):
– Calories: 250-300
– Carbohydrates: 30g
– Protein: 4g
– Fat: 15g
– Fiber: 1g
Key Nutrients
– Calcium from cream cheese
– Antioxidants from Biscoff cookies
Healthier Alternatives
Want to lighten it up while retaining that delicious flavor? Here are some healthier swaps:
– Use low-fat cream cheese instead of regular cream cheese.
– Opt for sugar-free cookies and powdered sugar.
– Substitute plain Greek yogurt in place of some cream cheese for added protein without sacrificing creaminess.
Serving Suggestions
These cheesecake cups are versatile and can be served in various ways. Here are a few ideas:
– Seasonal Fruits: Top with fresh berries like blueberries, strawberries, or raspberries for added freshness.
– Chocolate Drizzle: Drizzled with melted dark chocolate, they elevate the flavors wonderfully.
– Party Platter: Arrange them on a dessert table alongside fruit tarts or mini cupcakes for a lovely spread.
Common Mistakes to Avoid
While this recipe is straightforward, there are a few common pitfalls to watch out for:
– Not Softening Cream Cheese: If it’s not softened, you’ll end up with lumps in your filling.
– Over-Whipping Cream: Pay attention to the cream while whipping; it should have soft peaks.
– Not Chilling Long Enough: For optimal texture, do allow sufficient chill time—just a few minutes won’t cut it!
Storing Tips
Got leftovers? You’re in luck! Here’s how to store them properly:
– Refrigeration: Keep your cheesecake cups in an airtight container in the fridge, where they can last for up to 3 days.
– Freezing: For longer storage, you can freeze them in freezer-safe containers for about 2-3 months. Just remember to allow them to thaw in the fridge before serving!
Conclusion
These irresistible no-bake Biscoff cheesecake cups are the perfect mix of creamy, crunchy, and oh-so-delicious. With just five ingredients, you’ll impress your family and friends without breaking a sweat. Don’t forget to leave a comment letting me know how yours turned out, or consider subscribing to my newsletter for more delightful recipes!
FAQs
Can I use another type of cookie?
Absolutely! Any cookie can work, but if you want to stick with the same vibe, graham crackers or Lotus cookies are perfect alternatives.
Can I prepare these in advance?
Yes! They can be made a day ahead and are perfect for gatherings; just store them in the fridge until you’re ready to serve.
How do I know when the cheesecake is ready?
The cheesecake should set nicely in the fridge. It will firm up as it chills, so if it’s still too soft, give it a little more time.
Is it necessary to chill the cheesecake cups?
Chilling is essential for developing the flavors and achieving the right texture. Patience is key here!
Can I customize the flavors?
Definitely! Replace Biscoff with Nutella, peanut butter, or even caramel for a whole new flavor experience.
Feel free to explore more recipes here and elevate your dessert-making game!
Leave a review :
There are no reviews yet. Be the first one to write one.