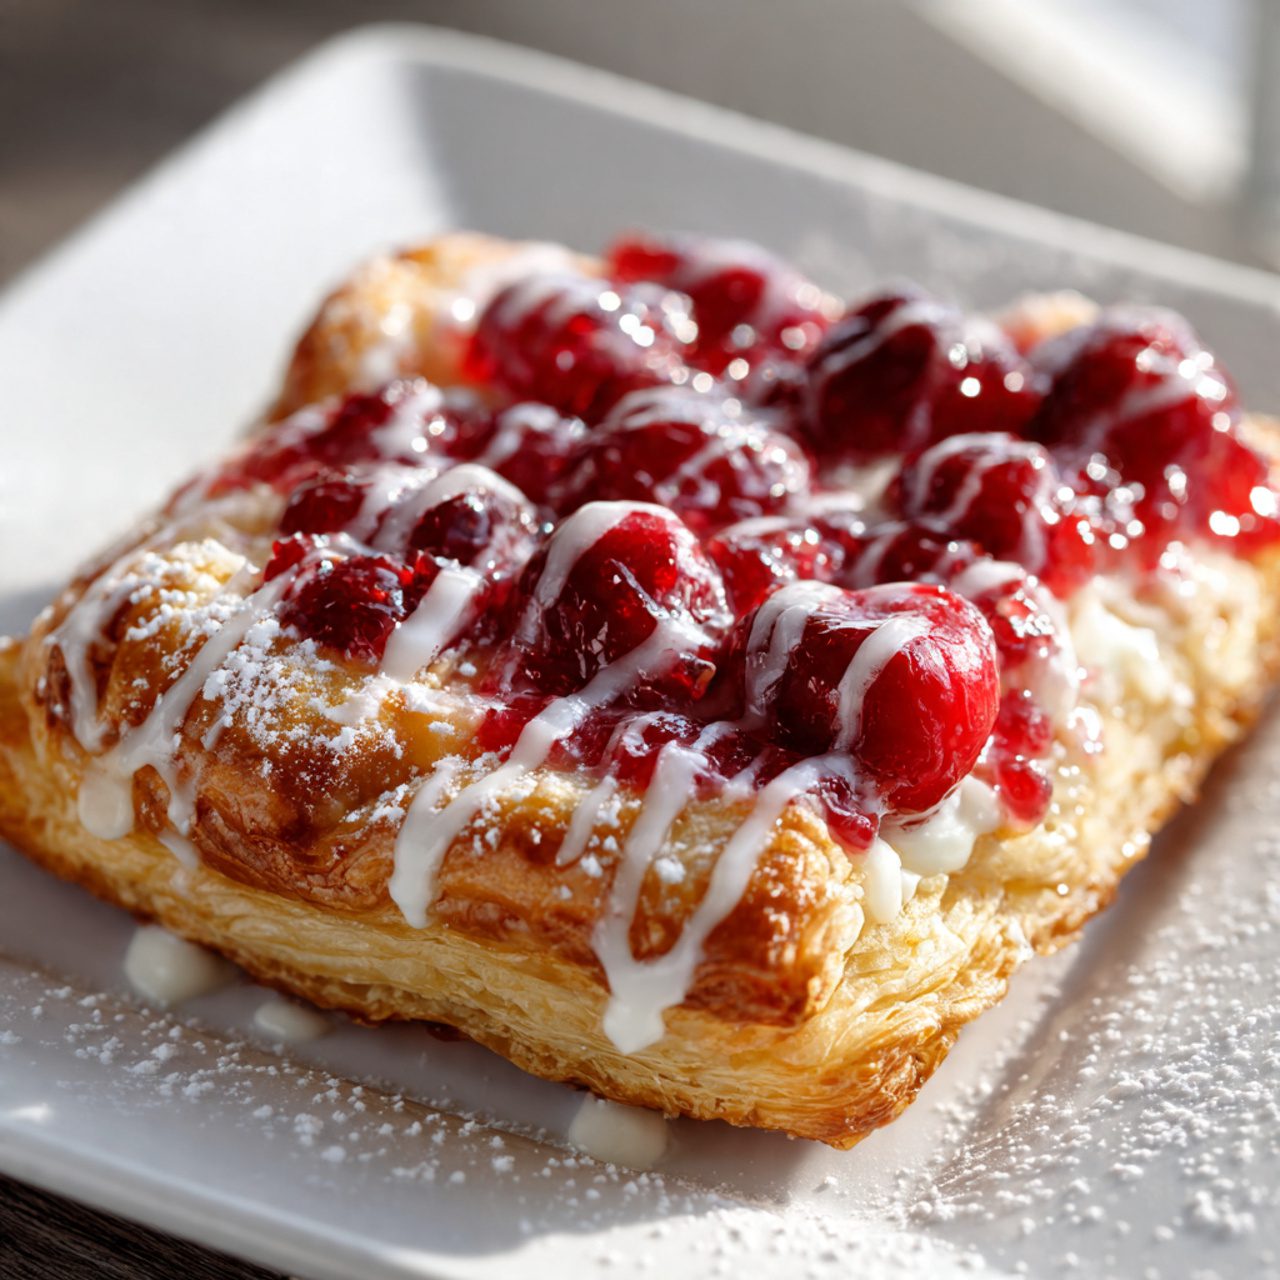
Easy Cherry Cheese Danish: A Irresistible Breakfast Treat
Introduction
Easy Cherry Cheese Danish : Have you ever wished you could whip up a delightful breakfast treat that makes you feel like a professional pastry chef? If so, you’re not alone! Many people think creating a Cherry Cheese Danish is a complex process that requires expert skills. However, with this easy puff pastry breakfast treat, you’ll discover that making this delicious pastry at home is simpler than you might think. Let’s dive into the world of flaky layers and sweet fruit, and get ready to impress your family and friends!
Ingredients List
To craft the perfect Cherry Cheese Danish, you’ll need the following ingredients:
Core Ingredients
- 1 package (17.3 ounces) of frozen puff pastry (2 sheets), thawed
- 8 ounces cream cheese, softened
- 1/4 cup granulated sugar
- 1 teaspoon vanilla extract
- 1 egg yolk
- 1 cup cherry pie filling (or fresh cherries if you prefer)
Substitutions
- For a lighter option, use Neufchâtel cheese instead of cream cheese.
- For a dairy-free version, you can substitute with a plant-based cream cheese.
- Sugar alternatives: Stevia or monk fruit sweetener can be used for a sugar-free option.
Timing
Prep Time:
- 15 minutes: Perfect for those busy mornings!
Cook Time:
- 25-30 minutes: Just enough time to warm up your kitchen and create an inviting aroma.
Total Time:
- 45 minutes: You’ll have a delightful breakfast ready in no time!
As the pastries bake, you can already sense the buttery aroma wafting through your home, making the hustle of mornings feel a little less hectic and a lot more delicious.
Step-by-Step Instructions
Step 1: Prepare the Puff Pastry
- Preheat your oven to 400°F (200°C).
- Unroll the thawed puff pastry sheets on a lightly floured surface. Gently roll them out to flatten and make them slightly larger.
Step 2: Create the Cheese Mixture
- In a medium bowl, combine the softened cream cheese, granulated sugar, vanilla extract, and egg yolk. Beat until smooth. This creamy mixture is the heart of your Danish.
Step 3: Cut the Puff Pastry
- Cut each puff pastry sheet into four squares. You’ll have a total of eight squares. Ensure they are evenly sized for consistent baking.
Step 4: Assemble the Danishes
Place about 2 tablespoons of the cream cheese mixture in the center of each square. Add a spoonful of the cherry filling on top.
To create the Danish shape, fold the corners of the squares towards the center, pinching them to seal the filling inside. Consider brushing the edges with a little egg wash for a golden finish.
Step 5: Bake the Danishes
- Transfer the assembled pastries to a baking sheet lined with parchment paper. Bake for 25-30 minutes or until the tops are puffed and golden brown.
Chef’s Tips:
- For a sweeter touch, drizzle icing made from powdered sugar and milk over the cooled pastries.
- Experiment with different fruit fillings, like blueberry or raspberry, for variety.
Nutritional Information
- Calories: 250 per serving (1 Danish)
- Protein: 4g
- Carbohydrates: 30g
- Fat: 14g
- Fiber: 1g
- Sugar: 6g
- Calcium: 90mg
Healthier Alternatives
Looking to make this delightful breakfast treat even more nutritious? Here are some easy swaps:
- Whole wheat pastry flour: If you’d like to try a whole grain option for the puff pastry.
- Fresh fruit: Use fresh cherries or other seasonal fruits for natural sweetness and added vitamins.
- Greek yogurt: Swap some or all of the cream cheese with Greek yogurt for a protein boost!
Serving Suggestions
These Cherry Cheese Danishes are incredibly versatile! Here are a few ideas for serving:
- Pair them with a side of Greek yogurt and fresh fruit for a balanced breakfast.
- Serve warm with a drizzle of honey or homemade vanilla glaze.
- For a brunch, present a platter with assorted pastries, coffee, and fresh orange juice.
Common Mistakes to Avoid
When making your Cherry Cheese Danish, here are some common pitfalls and how to avoid them:
- Overworking the Dough: Handle the puff pastry as little as possible to keep it flaky.
- Not Prepping the Cream Cheese: Ensure your cream cheese is at room temperature for a smooth filling.
- Skipping Egg Wash: A brush of egg wash not only adds shine but enhances the golden color of your pastry.
Storing Tips
To maintain the freshness of your pastries, follow these storage tips:
- Room Temperature: If you plan to eat them within a day, store them covered at room temperature.
- Refrigerate: For longer storage, keep them in an airtight container in the fridge for up to 3 days.
- Freeze: For up to 2 months, tightly wrap unbaked assembled Danishes in plastic wrap and freeze. Bake directly from frozen, adding a few extra minutes.
Conclusion
Making a Cherry Cheese Danish is not only achievable but also incredibly rewarding! These delightful pastries can elevate your breakfast or brunch menu with ease. So roll up those sleeves and impress your loved ones with your newfound culinary skills. Don’t forget to share your experiences! Leave a comment below or sign up for our newsletter for more delightful recipes and tips!
FAQs
Can I use store-bought cherry filling?
Absolutely! Store-bought cherry filling is not only a time-saver but also gives you consistent results. Just make sure to choose one with natural ingredients for the best flavor.
How can I make these ahead of time?
You can prepare the Danish in advance, freeze them, and then bake them fresh in the morning. Just remember to adjust the baking time if they are frozen.
Can I use another type of cheese?
Certainly! Ricotta or mascarpone can be great substitutes for cream cheese, giving a different texture and flavor to your pastries.
What drinks pair well with this treat?
Coffee, tea, or even a refreshing glass of iced tea complement these pastries wonderfully!
How do I make the pastry crispy?
Ensure your oven is fully preheated and do not overcrowd the baking tray, allowing the heat to circulate around each pastry for optimal crispiness.
Feel free to explore related recipes from our blog, such as our Blueberry Muffin Recipe or Cinnamon Roll Recipe, to broaden your baking repertoire! Your kitchen awaits these tasty delights!
Leave a review :
There are no reviews yet. Be the first one to write one.